![]()

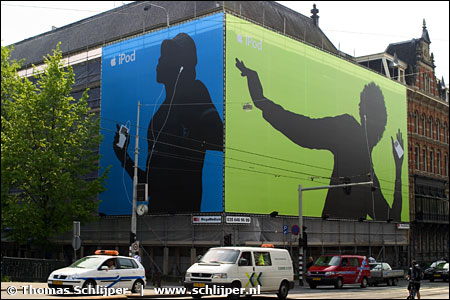
Have you ever seen an ad for iPod? There is always a person in an expressive pose and that person is completly silhouetted. Then there is the element of the iPod that is highlighted in white. Below are some samples.

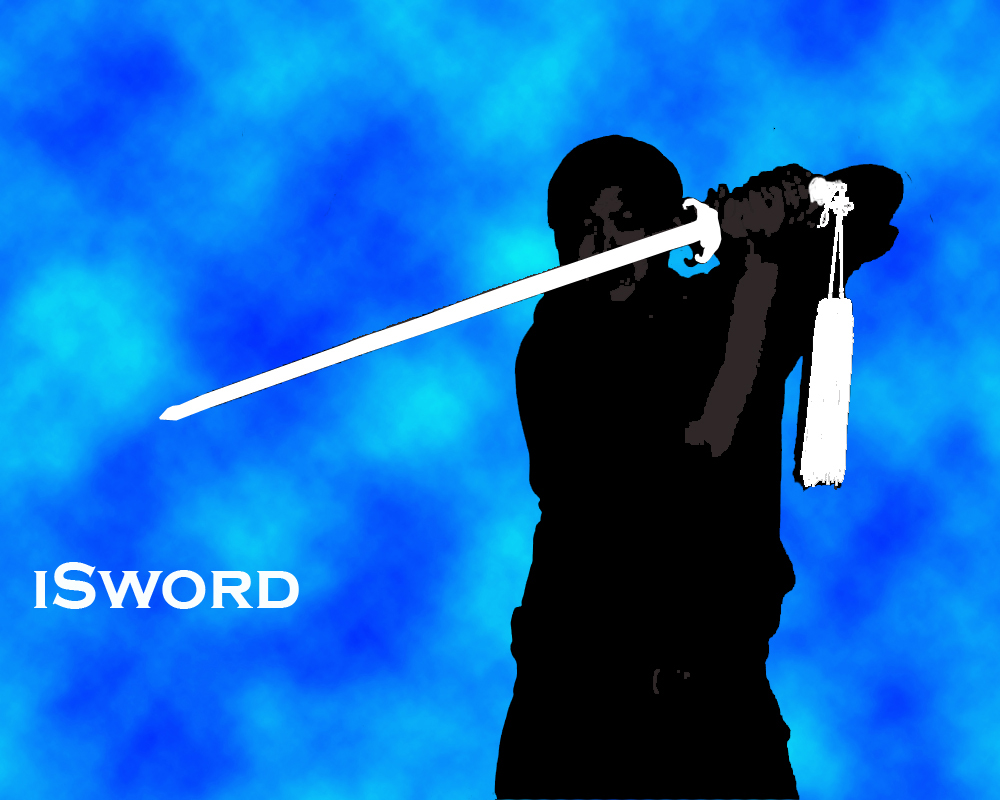
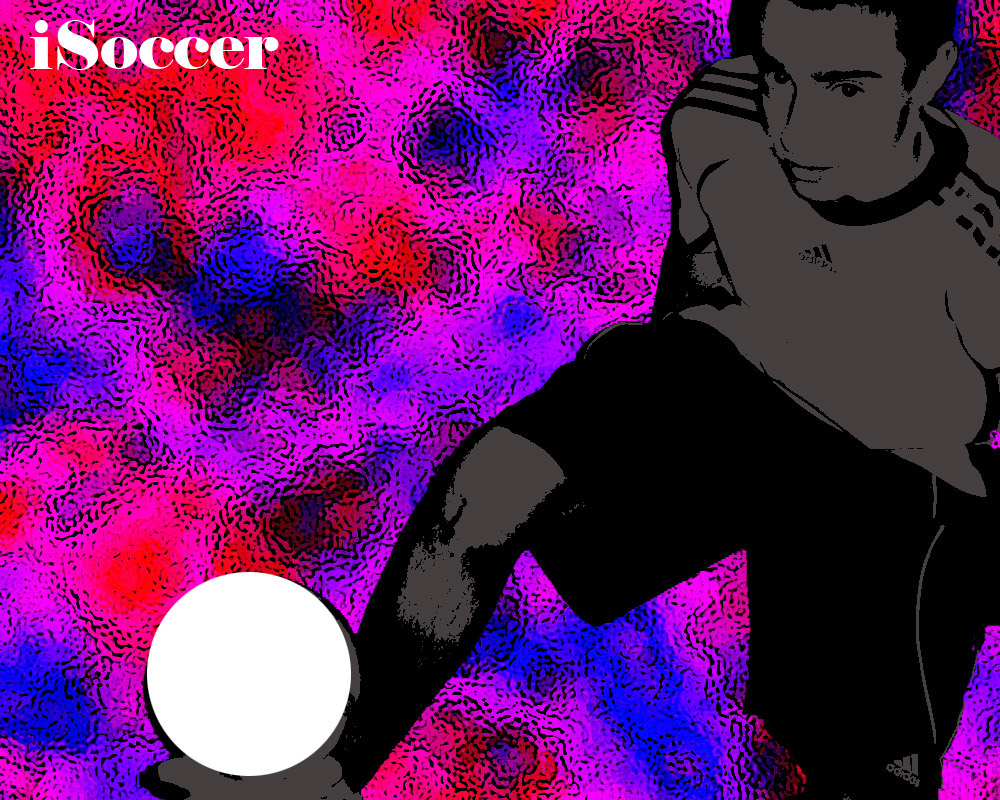
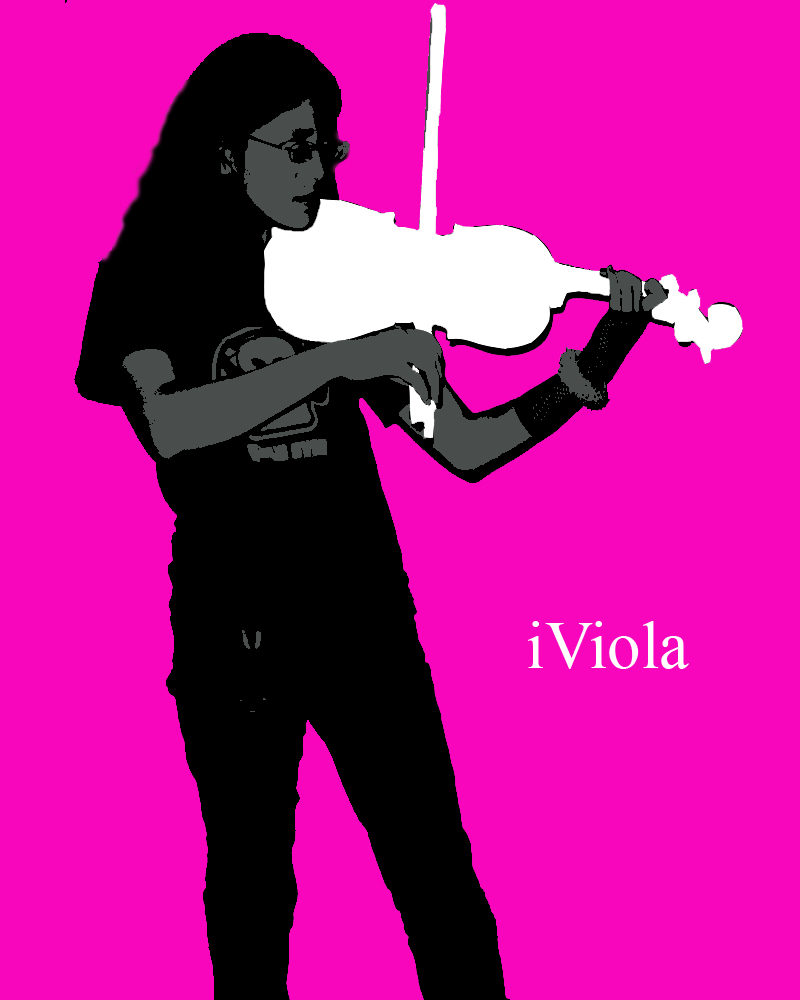
This tutorial will teach you how to create an "iPod Ad". You do not need to use an ipod. You are able to use any object that you wish including basketballs, guitars, or an article of clothing.
| Step 9 | Step 10 | Step 11 | Step 12 | Step 13 | Step 14 |
STEP 1 ñ Strike a Pose:
Have someone take a picture of yourself using the digital camera and green
screen. Make sure that your pose is expressive and that you have an
element that can be highlighted in white.
STEP 2 ñ Download Your Picture to Your Student Space:
Use the USB cable to connect the camera (make sure the power is on) to your
computer. On your computer go to Start>My Computer and the camera will show up
as Sony Memory Stick. Open the DCIM Folder and then the 101MSDCF Folder. Find
your picture and then you copy it to your Images folder on your Student Space.

STEP 3 ñ Create a New Photoshop File:
Name = A8_iPodGraphic; Width = 10 inches; Height = 8 inches; Resolution = 100
pixels/inch; Color Mode = RGB. Leave the other settings at the defaults.
Immediately save the file to your assignments folder.
STEP 4 ñ Determine Layout Orientation:
Open the file with your image and determine if your layout will work best in a
horizontal or vertical layout. If a horizontal layout is best, skip to STEP 5.
If your image will work better in vertical mode, in A8_iPodGraphic, rotate the
canvas 90ƒ (Image>Rotate Canvas>90ƒ).

STEP 5 ñ Crop, Copy and Size Your Image:
Use the Crop Tool to Crop your image as close as possible without removing any
part of you. Copy the cropped image to A8_iPodGraphic file (Ctrl-A, Ctrl-C).
Rename the layer Original Image. Resize your image (Edit>Transform>Scale) so
that the figure will fit in your layout. Leave some room so the vibrant
background will show through. Make sure you hold down the Shift key and drag
from the corner handles when you scale the image to maintain the proportion and
avoid distorting the image.
STEP 6 ñ Make a Selection of Your Image:
Make a Copy of the Original Image layer and name it Silhouette Image. Turn off
the viewing of the Original Image layer. Select the Silhouette Image layer. Use
the Magic Wand Tool and click on the green screen area. Hold down the Shift Key
to select other green screen areas that are not continuous and other areas that
are not part of you. You can also use Quick Mask Mode to clean-up or even make
your selection. Once you have all of the background selected, save the selection
to a Channel (Select>Save Selection). Name the channel Silhouette.

STEP 7 ñ Remove the Background from the Silhouette Image Layer:
Reload the Silhouette Selection (Select>Load Selection>Silhouette). Press the
Delete key and the background of the Threshold Image layer will be Deleted. Make
sure viewing of the Original Image layer is turned off otherwise it will look
like the background was not deleted.
STEP 8 ñ Threshold the Silhouette Image Layer:
Make sure that Silhouette Image layer is selected. Use Threshold
(Image>Adjust>Threshold) to convert the image into black and white. Choose a
setting that leaves some of the areas white but not too many. Move the slider
until you get the result you are looking for.
STEP 9 ñ Fill the White Areas with Dark Gray:
Use the Magic Wand Tool to select a white area of the Silhouette Image layer and
then Select all Similar whites (Select>Similar). Choose a dark gray foreground
Color and fill the selected area (Alt-Delete).
STEP 10 ñ Make a White Selection:
Turn off viewing of the Silhouette Image layer and turn on the viewing of the
Original Image layer. Make a Selection (using the Polygon Lasso) of the element
in your image that you want to highlight in white. Save that Selection
(Selection>Save Selection) as White Element.
STEP 11 ñ Create the White Element:
Create a New Layer and call it White Element. Select white as your Foreground
Color. Make sure the White Element Layer is active by clicking on it. Load the
White Element Selection (Selection>Load Selection>White Element). Fill the
Selection with white (Alt-Delete).
STEP 12 ñ Typeset Your iTitle.
Select white as your Foreground Color. Use the Type Tool to set a title to your
graphic such as iJohn or iScorer. Use a font size of 48 points.
STEP 13 ñ Create the Background.
Select a vibrant Foreground color and fill the background layer with it (Ctrl-A,
Alt-Delete).
STEP 14 ñ Create an Alternate Background in the Style of the New iPod Ads.
Use your creativity, imagination and Photoshop skills to create an Alternate
Background for your iPod Graphic. A cool background to create is going to
Filter>Render>Clouds or Different Clouds. You can also make your own any way you
know how. Call the Layer Background ñ New Background Style.